
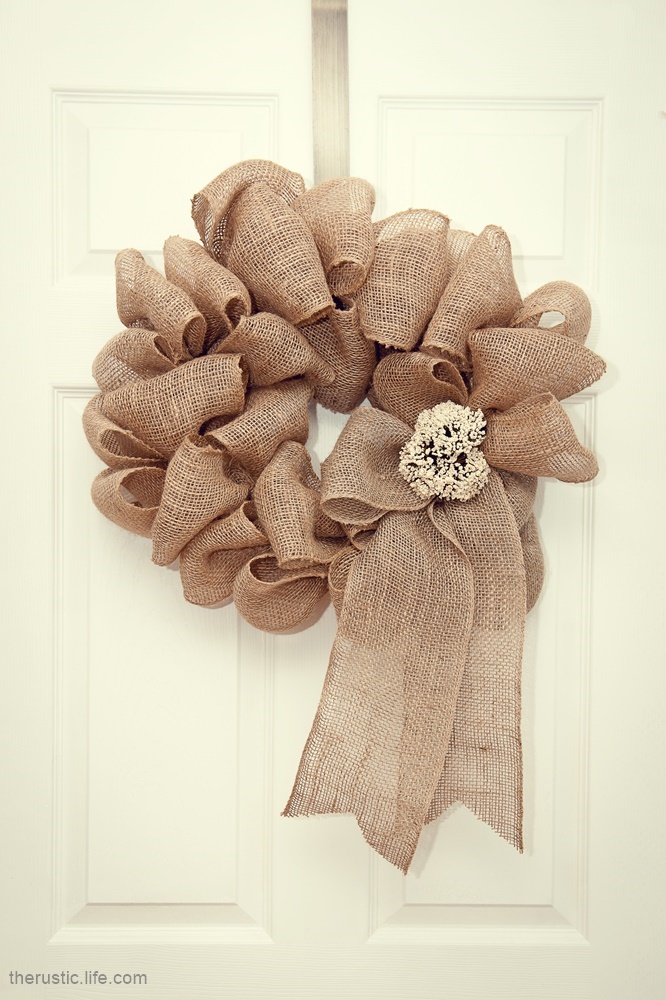
Tis the season for doors to be dressed that say “WELCOME, COME ON IN” Today we are happy to share an easy DIY tutorial for a burlap wreath. What’s so great about this wreath is that it can visit web be used year round. You can leave it as is or add an embellishment such as a bow or floral pic as pictured in the one we did.
ITEMS NEEDED:
Straw wreath in the size you would like
Burlap Ribbon
Scissors
Wired Floral Picks
Embellishment or bow of your choosing
DIRECTIONS:
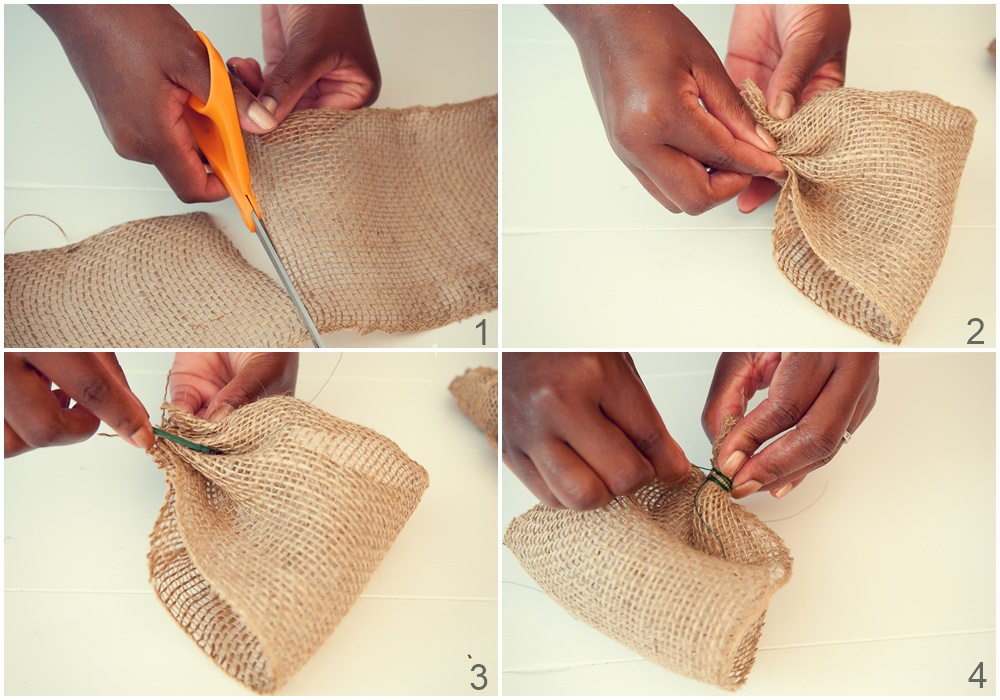
1. Cut ribbon into 8 inch strips (make as many as needed as you go along)
2. Fold the ribbon in half and at the same time insert floral pic and wrap wire around to bind the ribbon ends together. This will result in the pick being left out and ready to be inserted into the straw wreath.
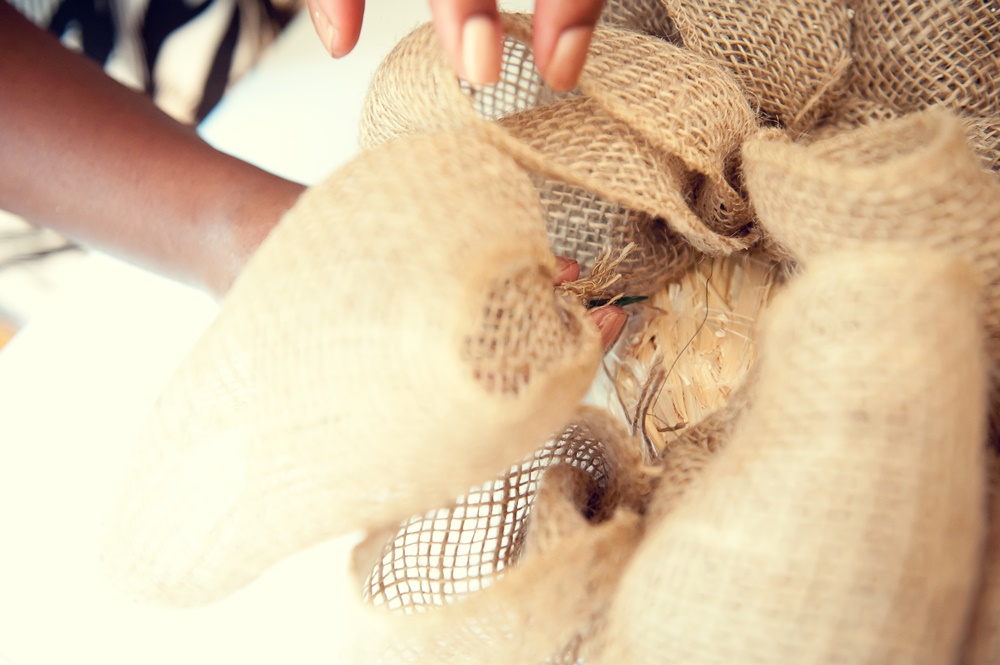
3. Start inserting the assembled burlap pieces around the wreath in a clockwise pattern until the entire straw wreath is covered.
4. Embellish as you wish.
NOTE: Don’t put any of the burlap on the back of the straw wreath. This needs to remain empty so that the wreath can be hung on a flat surface.
EASY. PEASY. PRETTY.

Comments are closed.