
It’s time for our virtual workshop party loves…remember when I said on this post that on Monday, April 11th there would be a virtual party for this Hanging Gutter Planter… well today is the day that I get to share the final photos and details behind making this DIY Hanging Gutter Planter in partnership with The Home Depot. The planter was easy to make and I got all the supplies at The Home Depot. Myself and 24 other talented blogger friends are all sharing with you our final projects, so don’t forget at the end of the post, to find the links to their blogs and party on to see what these ladies have come with. Estimated project cost (not including tools) $13
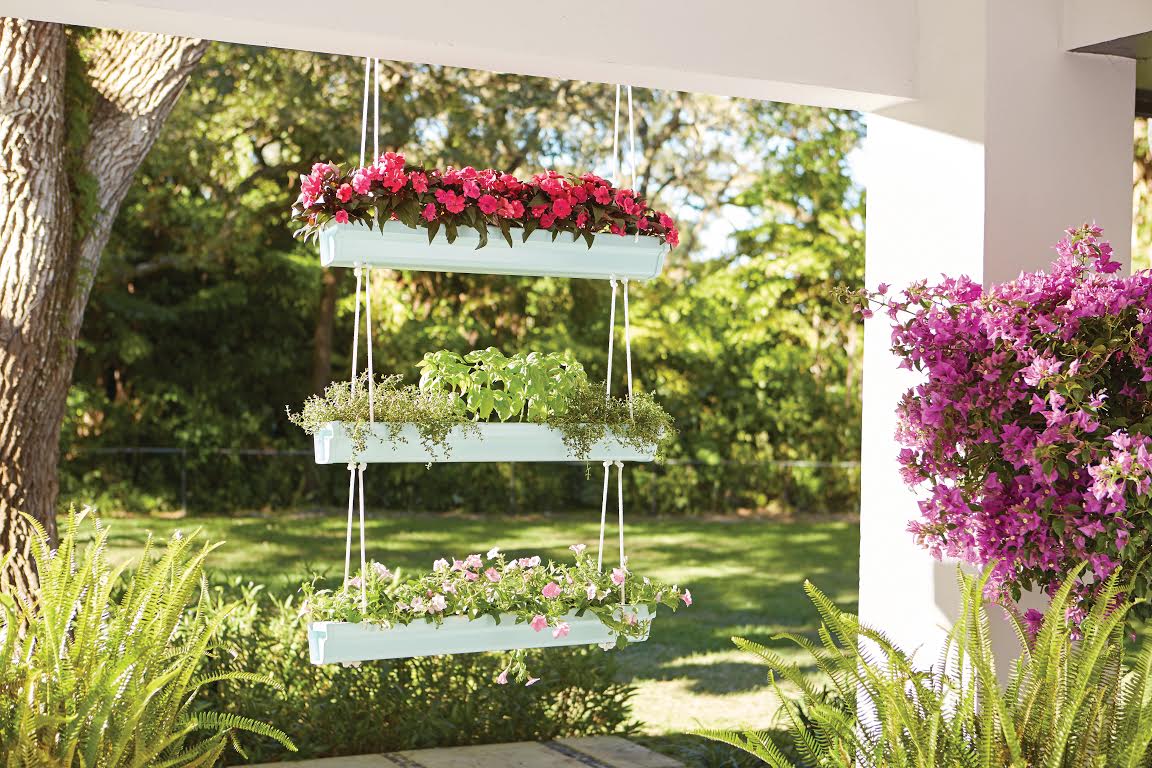
THIS IS THE HOME DEPOT’S INSPIRATION PHOTO FOR THE PROJECT
Here is a list of the materials you will need:
- 1 – 10 ft. white traditional vinyl gutter
- 3 – Sets – white vinyl K-style end cap (2 pack)
- 1 – 20 ft. – 1/4 in. X 1 foot white braided nylon and polyester rope (rope cut at the store)
- 1 pack 1/4 in. X 2 in. zinc-plated rope S hook
- 2 – 3 and 3/4 in. steel screw-in plant hook
(Optional Materials)
Exterior spray paint that adheares to plastic and any accessories for application
Electrical tape
Here is a list of tools you will need:
- Heavy duty scissors or a box cutter
- 3/8 inch drill bit
- Drill
- Jigsaw
- Measuring tape or carpenters square
- Pencil
- Safety Gloves
- Safety Glasses
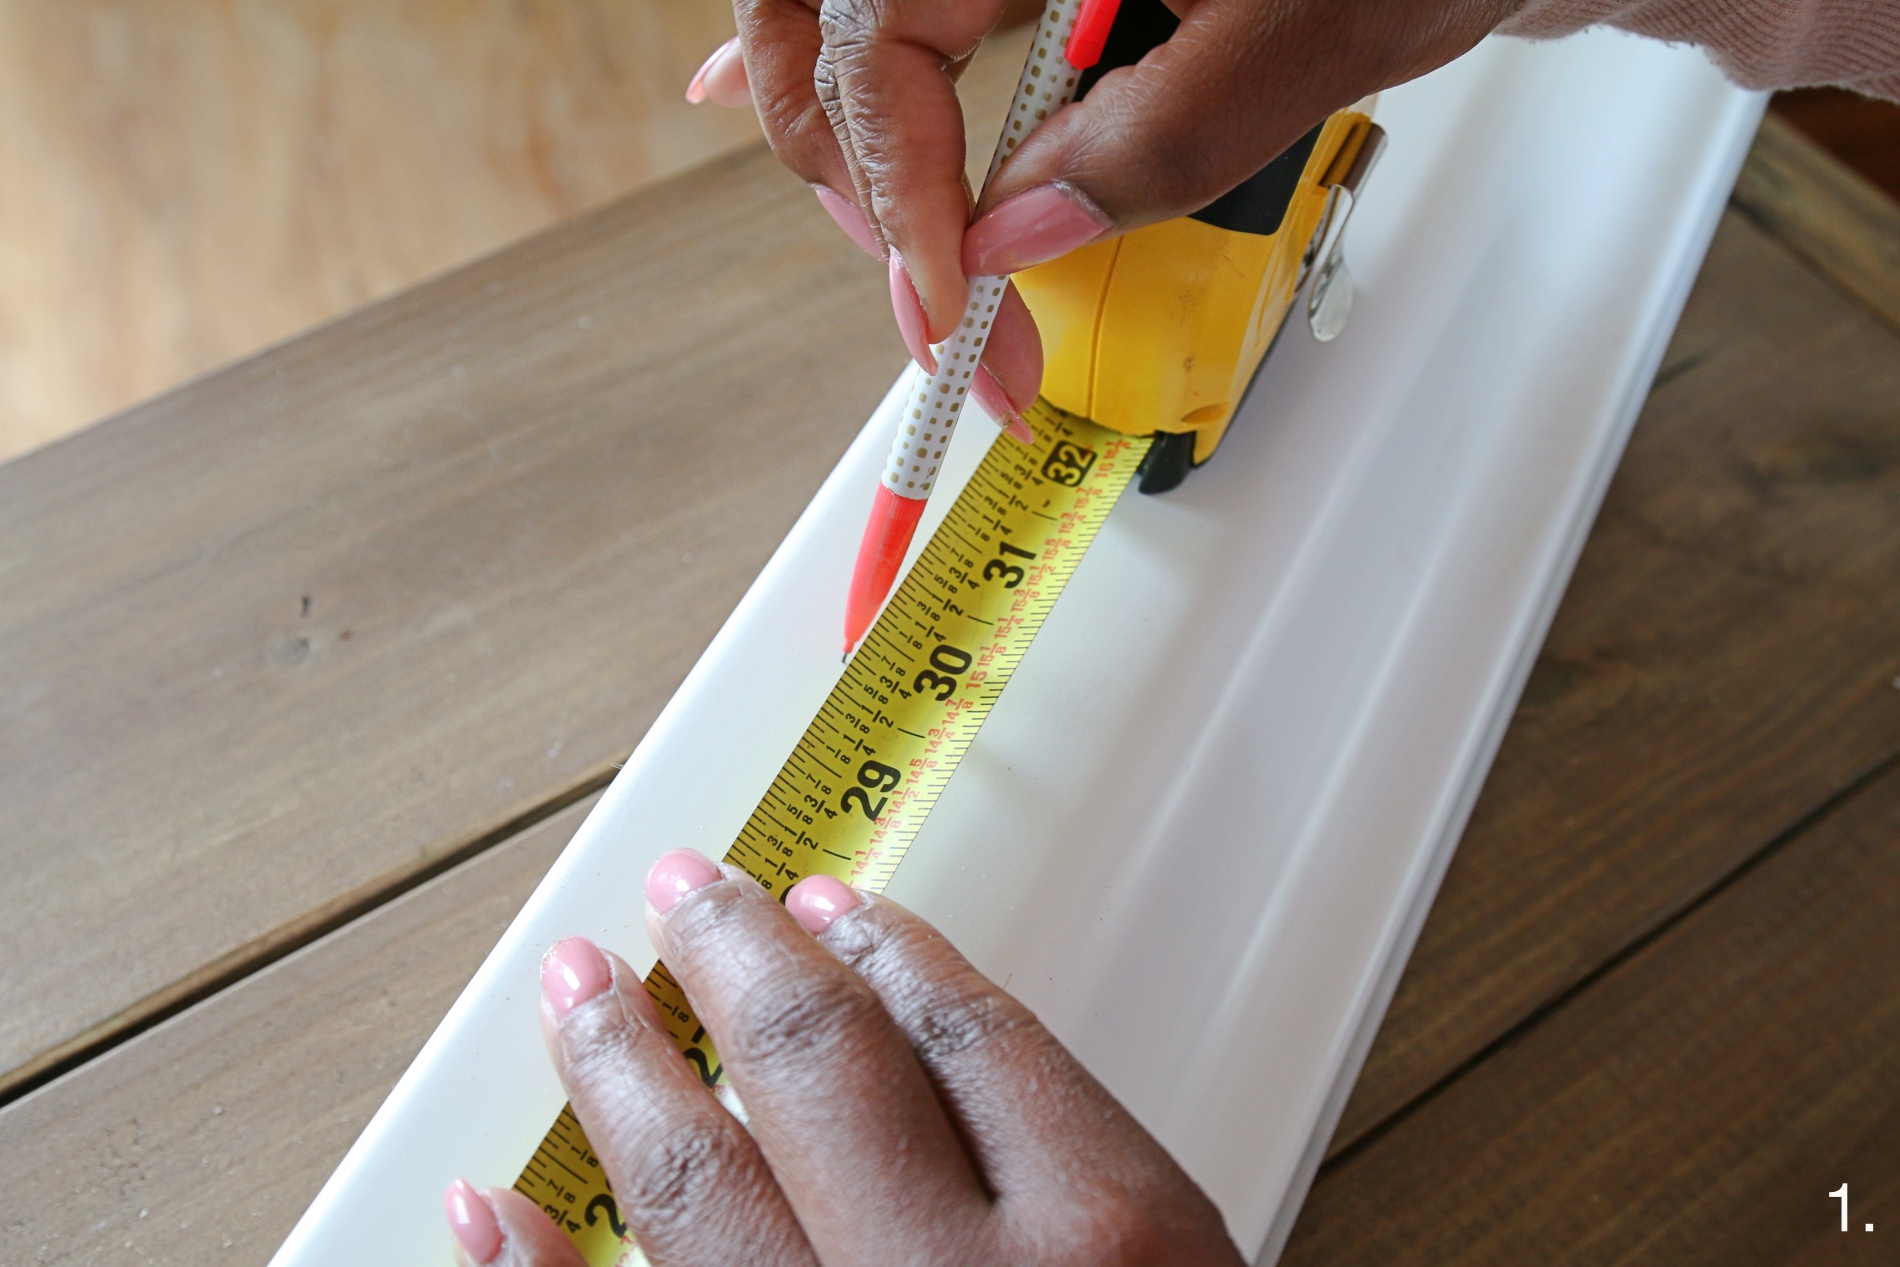
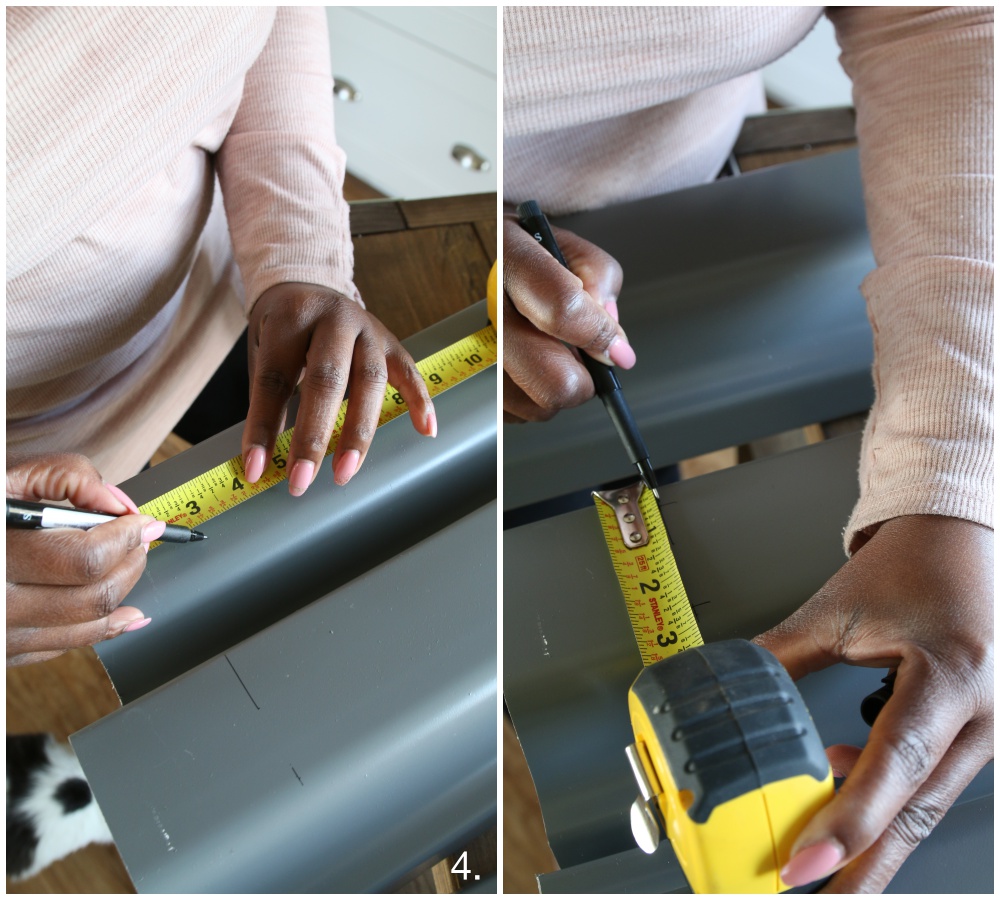
Measure and mark three – 30 inch sections from the 10 foot gutter and two – 10 foot sections from the rope.
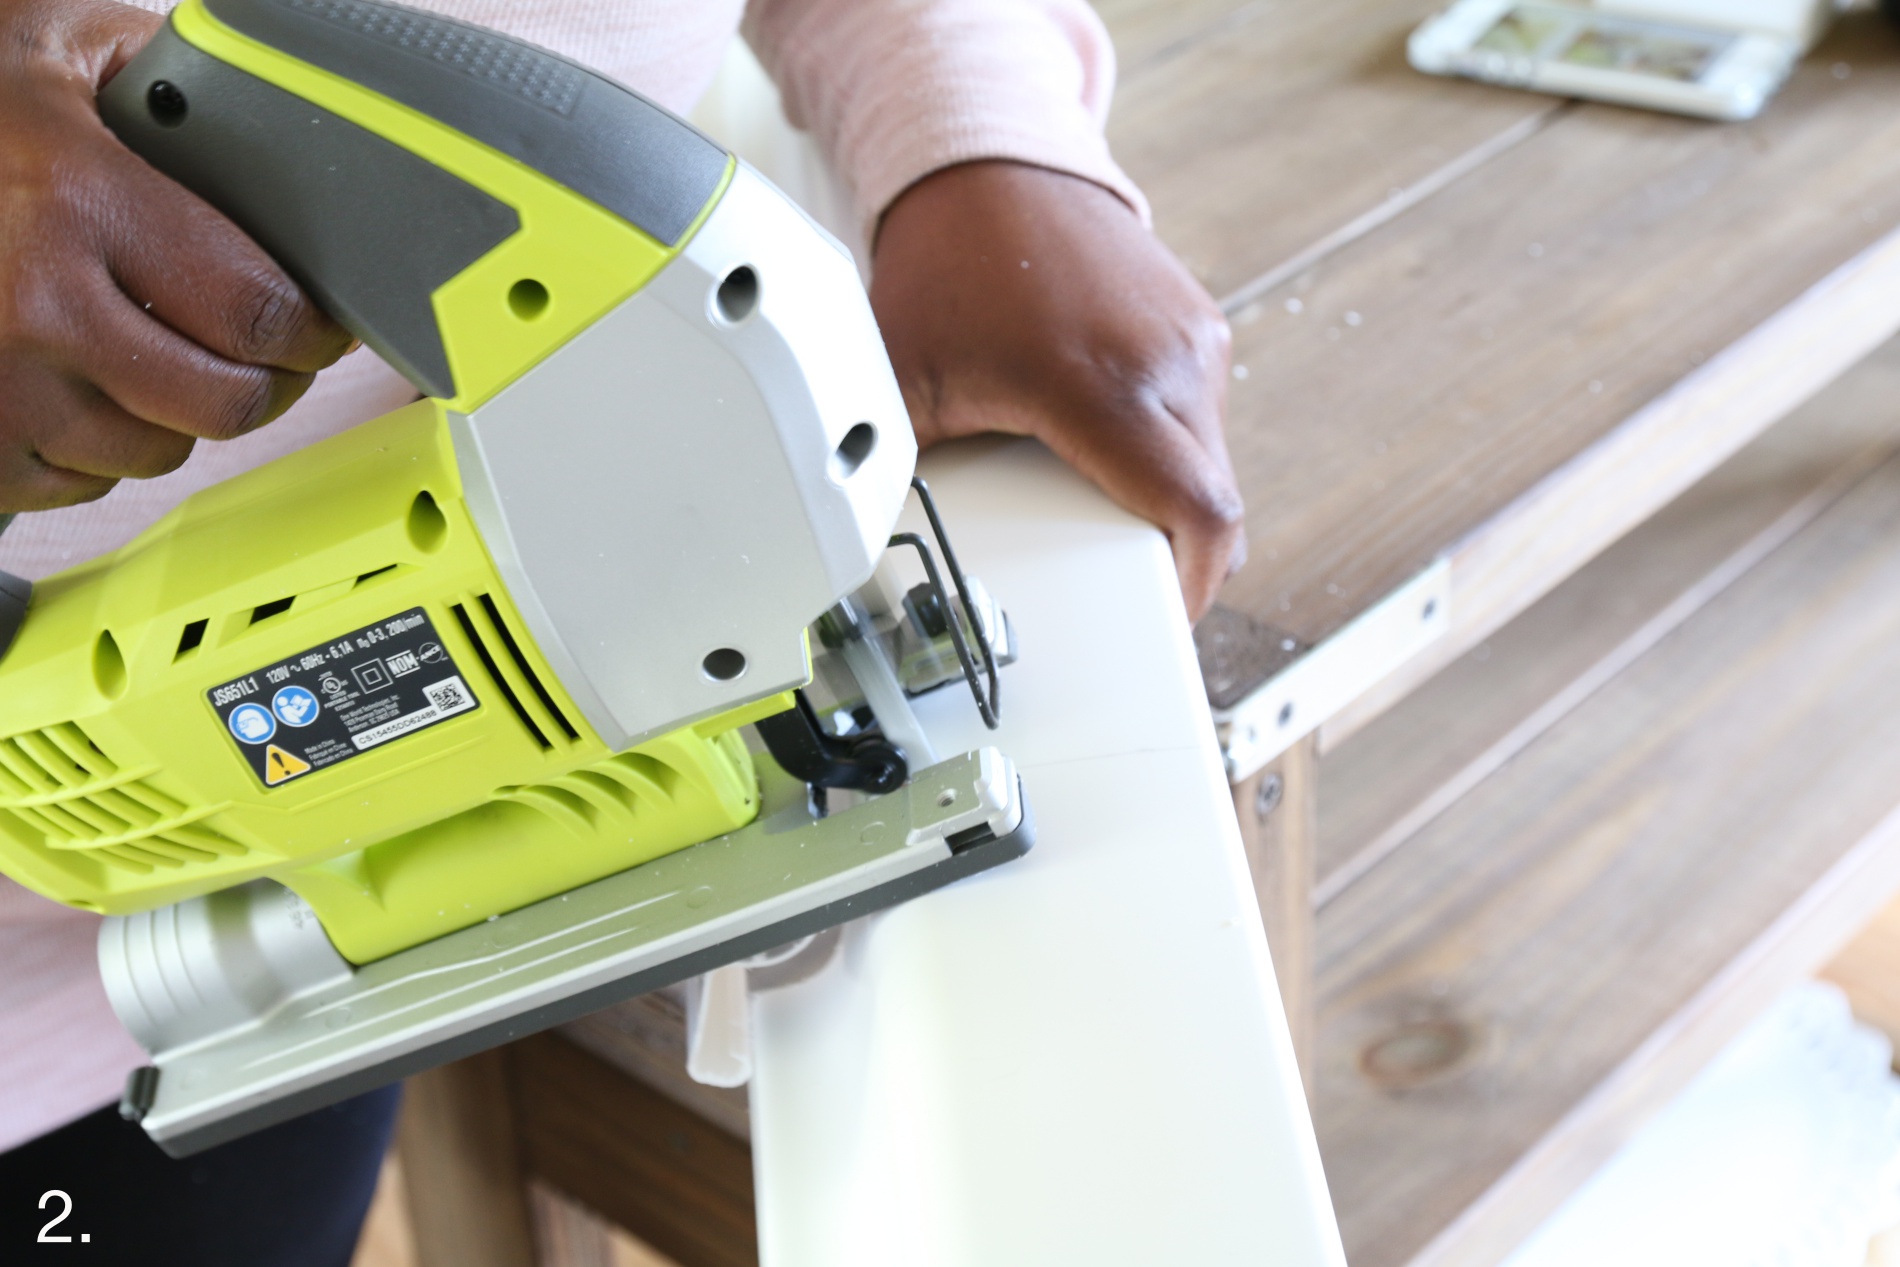
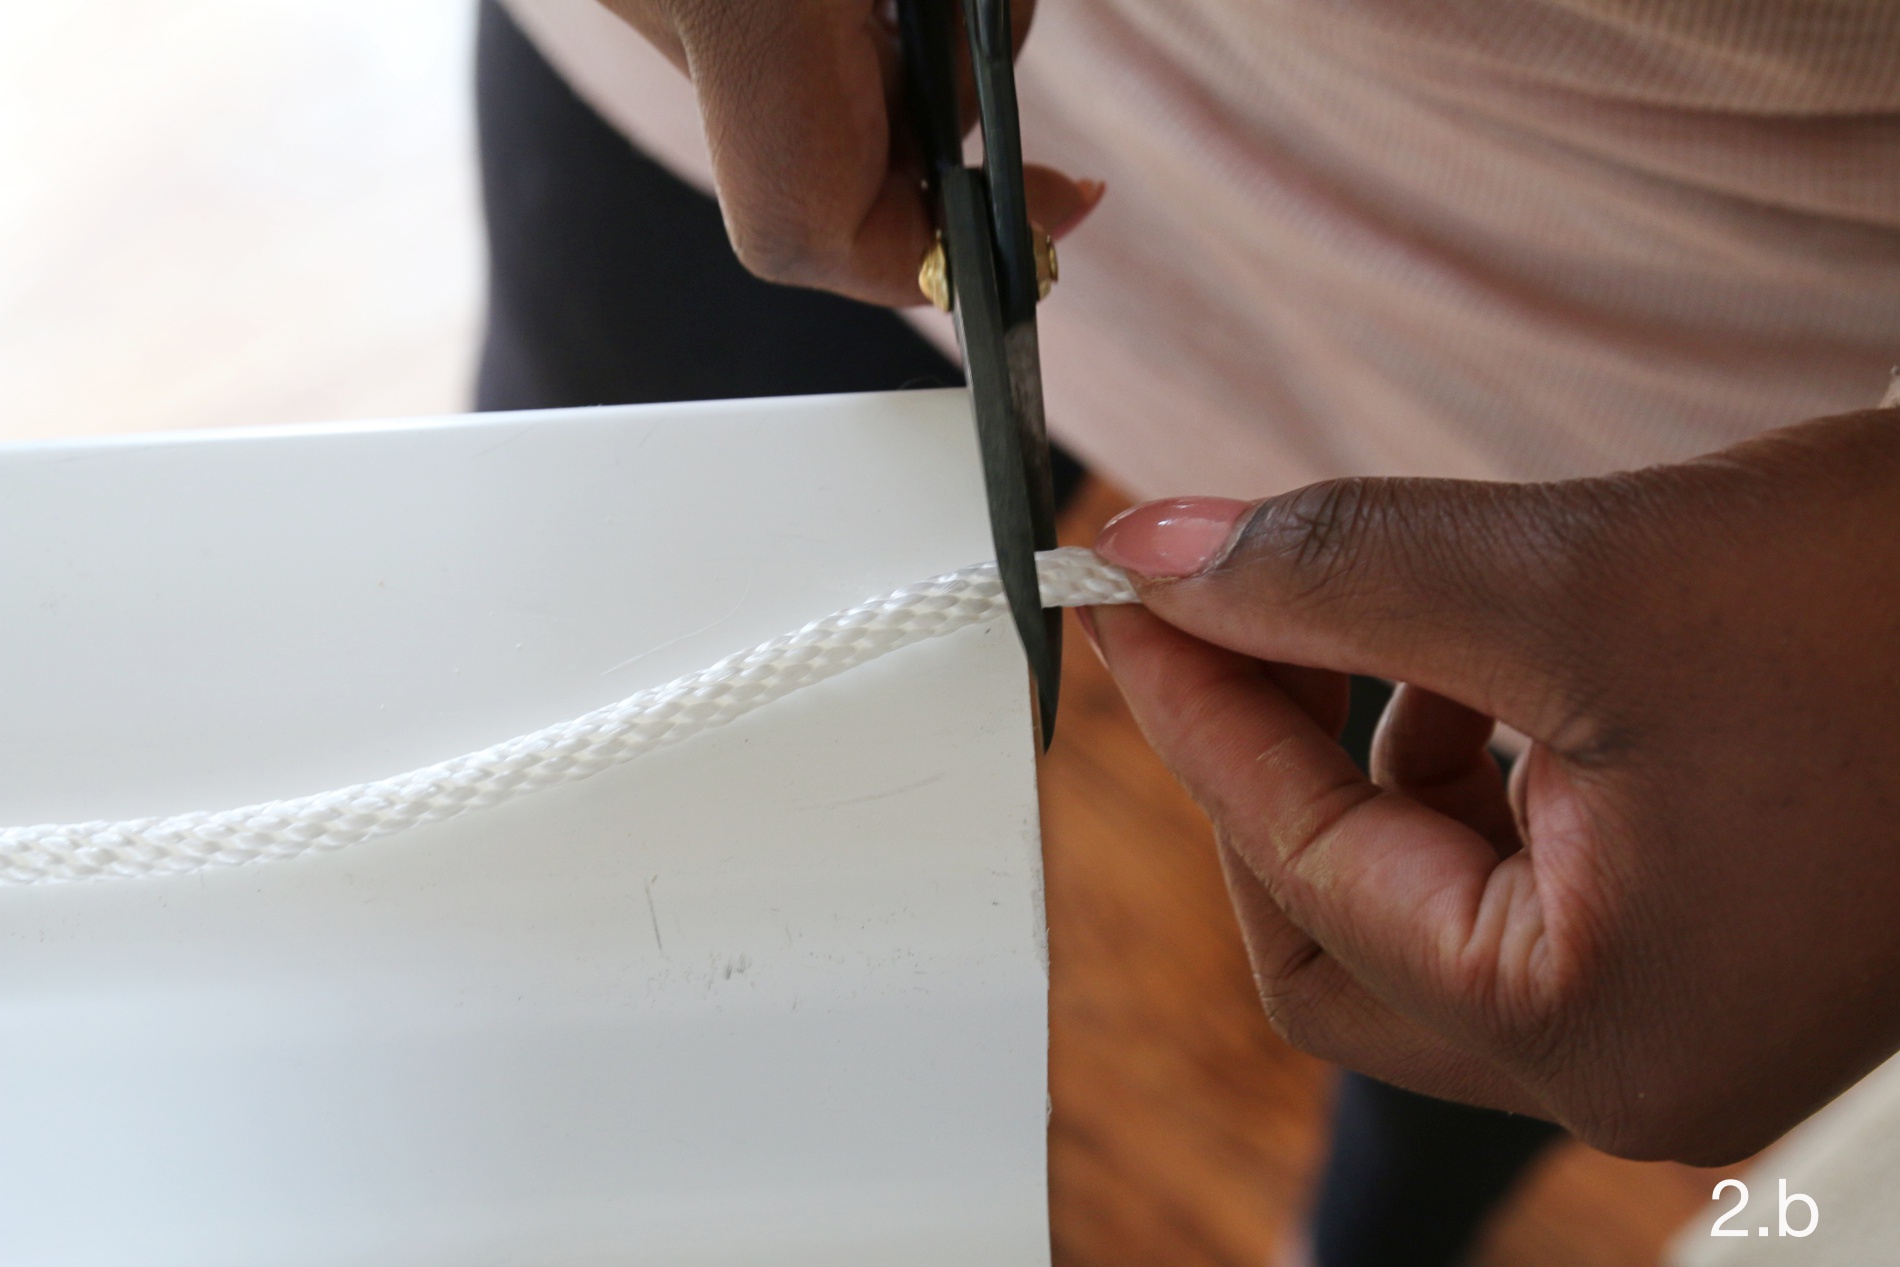
Cut the three – 30 inch sections form the 10 foot gutter using a jigsaw. Then cut the two 10 inch sections from the rope using heavy duty scissors or a box cutter.

If changing the color of the gutter by spray painting them, please do so before assembling.
Turn all gutters upside down. Measure ad mark 3 inch in from the short side and 1/2 inch in from the long side on all four corners of all three gutter sections.

Using a 3/8 inch drill bit and drill, drill holes where the marks were made. There should be four holes in the bottom. TIP: Depending on the type of plants used, you may need to drill several very small drainage holes on the bottom of the gutter section to allow drainage.

Tie a knot at one end of the 10 foot length rope. Thread the unknotted end of the rope through one of the holes in the bottom of the left gutter section. Repeat threading through the hole on the next two left gutter sections. Be sure to measure 12 inches of slack and tie knot between the second and third sections. Once all three gutter sections have been threaded, loop the rope and thread it back down the inside hole of the left gutter. Once the rope has been threaded down through the last remaining bottom hole of the third gutter section, be sure to make a final knot and cut any excess rope. Repeat these steps for the right side of the gutter with the other 10 foot length rope. TIP: Wrapping the end of the rope with the tape makes threading easier. Place all the vinyl K-style end caps on the ends of the three gutter sections.

Secure plant hooks into a beam or support where you intend to hang your garden. Loop the two S-hooks on each side of the top ropes and hook the S-hook to the installed plant hooks. Once hanging, loosen and adjust the knots beneath each gutter section until they hang level.
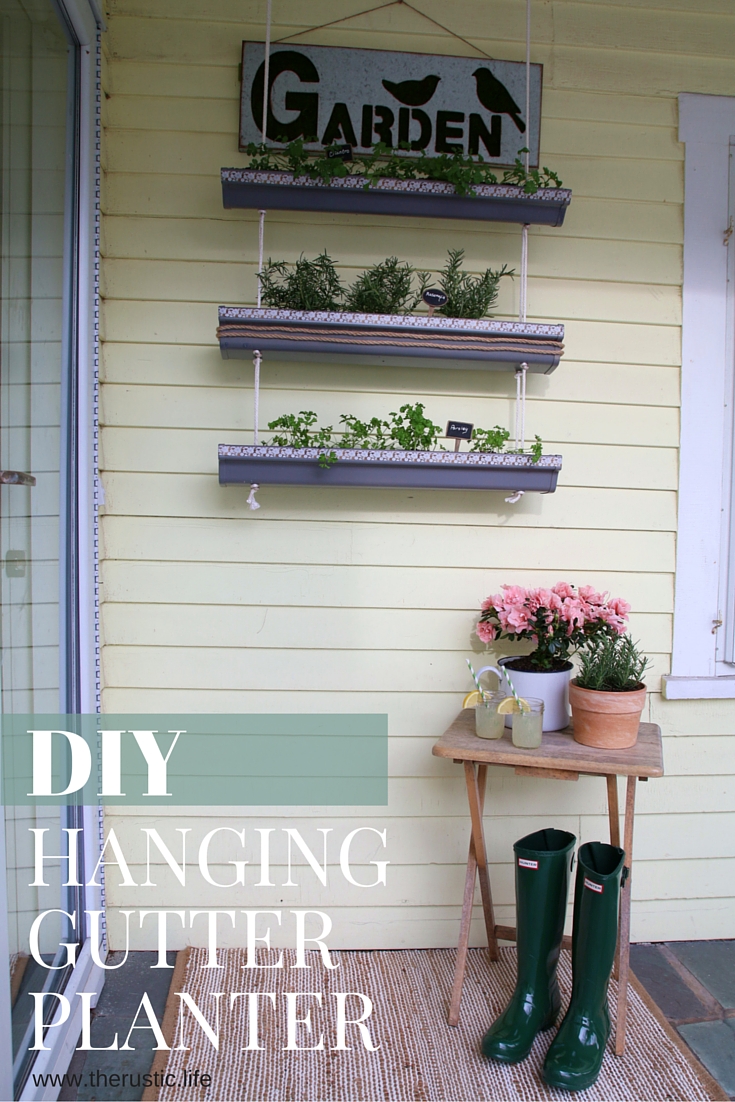
Fill your planter with potting soil and the plants that you want. Because I love to cook, I choose to plant herbs that I use frequently in cooking. Rosemary, cilantro and parsley.
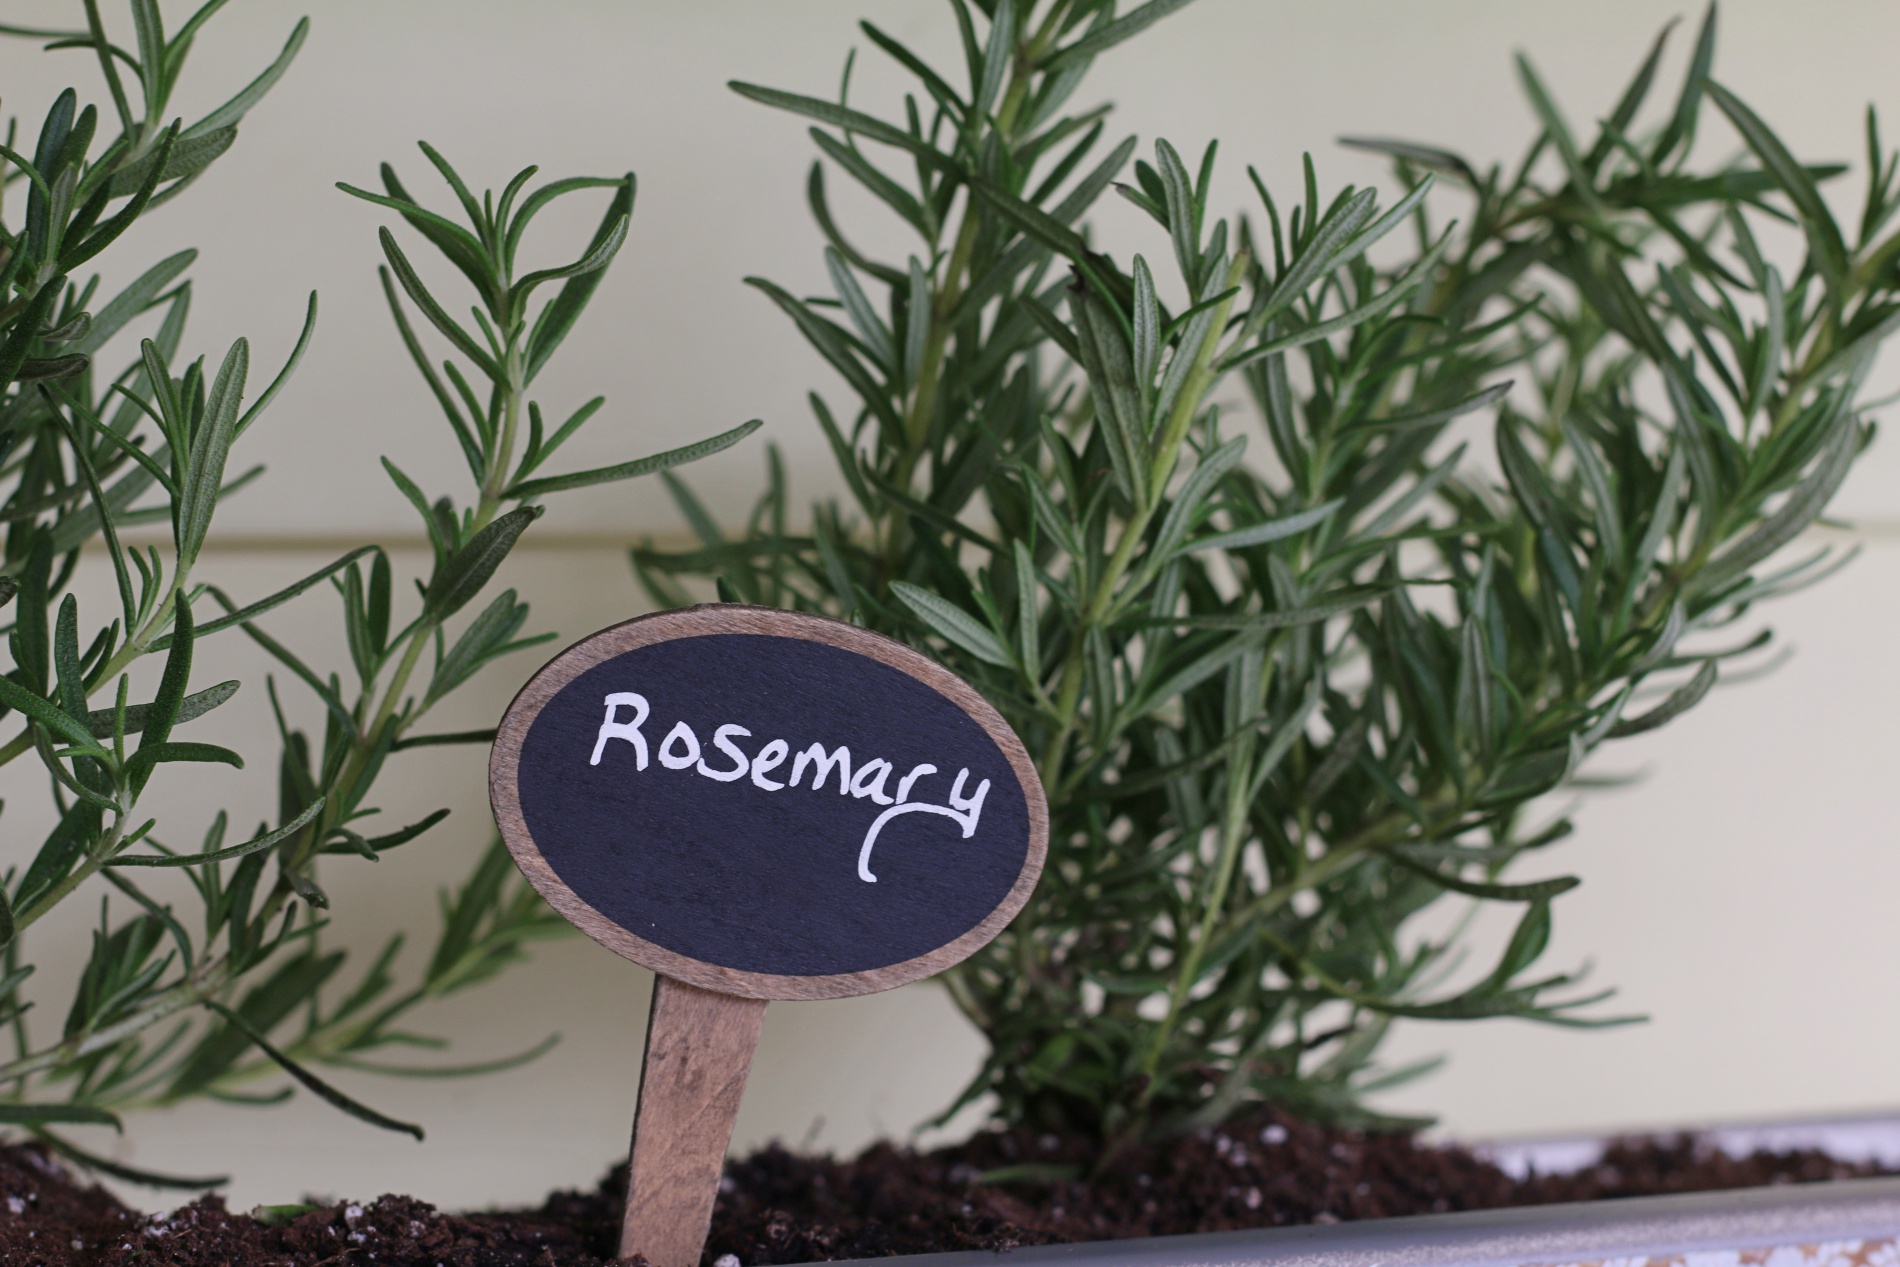
Rosemary.

Cilantro.

Parsley.

I decorated around the edges of the planter with washi tape and rope that went with my decor style.
Now how useful and pretty is this project. Home Depot never fails when it comes to inspiring us DIYers. They have workshops at all of their locations for you do-it-yourselfers out there and like I said before they are all FREE!!! You can visit www.workshops.homedepot.com to learn more.
You can attend your local Home Depot’s workshop and make your very own planter after the virtual party. It’s a fun time to grab some girlfriends and make it a girls night out!
DATE AND TIME:
Thursday April 21, 2016
06:30 PM – 08:00 PM
Remember to hop on over to the other girls blogs and attend the virtual party and see how they DIY’d and styled their very own Hanging Gutter Planter
The Glam Farmhouse / A House and a Dog / Our Vintage Farmhouse / Boxwood Avenue / The Creative Mom / Her Toolbelt / The Contractor Chronicles / A Girl and a Glue Gun / Make It Love It / Live Laugh Rowe / My Fabuless Life / Place of my Taste / Hawthorne and Main / House By Hoff / Domestically Speaking / My Repurposed Life / Restoration Redoux / Designs By Studio C / Cupcakes and Crinoline / All Things Thrifty / Lou Lou Girls / Reality Daydream / Over The Big Moon / Pretty Providence
I acknowledge that The Home Depot is partnering with me to participate in this program. As a part of the program, I am receiving compensation in the form of products and services, for the purpose of promoting The Home Depot. All opinions above are my own and my experience with the product and brand.
Sandra,
Your gutter planters are so cute! They look so sweet hanging on your porch.Your plant markers and embellishments really show it off!
gail
Awww thank you so much Gail…it was hard to decide where to put it
Love the idea of using Washi tape on the front of the gutter pieces – love the herbs, as well!
Thank you so much! I just liked the easy use of using it 🙂